Thursday, November 3, 2011

Scarlet Gingerbread Muffins


There's something about fall that just cries out for muffins. And spices. And something a little sweet and special.

But (ask anyone) I am a food nazi. I admit I am obsessive about what my daughter eats. I am also obsessive about not wasting anything. Sometimes these tendencies are frustrating. Other times, like today, they result in a fortuitous discovery of a new favorite food.


We had some boiled beets sitting in the fridge that needed to be used.


I wanted something other than your typical beet-chocolate combo.


But the only other recipes I found sounded boring, with nothing special in them but beets!


Oh, and sugar. Let's not forget the sugar. Every recipe had plenty of sugar. That's a no-no in this house. As is regular, all-purpose flour, unless you're a cake or a cookie.


So, we just had to come up with our own recipe.


If you try these, beets might just become your new favorite food. I guarantee, you can't eat just one! These are even sweet enough to call a cupcake, if you so desire. They would be lovely as a first birthday cake, spread with a little honey-cream cheese frosting.


If you are cooking with a little one, remember, beets stain! Vinegar, lemon juice and cold water are your friends. A little pre-wash spray doesn't hurt either.

I'm sorry I don't have exact spice measurements. That's what happens when a two year old shakes in the spices for you.

Enjoy!


Scarlet Gingerbread Muffins

2 cups white whole wheat flour
2 t baking powder
1 t baking soda
1/2 t salt
Approximately:
1 1/2 t ginger
1-2 t cinnamon
1/4 t cloves
1/4 + t nutmeg
1 cup milk
1/3 cup oil (we used a mixture of coconut and olive since I didn't have veggie on hand)
2 large eggs, beaten
1/4 cup honey
1/4 cup molasses
1 t vanilla extract
1 cup pureed beets

Preheat oven to 350. Whisk together dry ingredients. In a separate bowl, whisk together wet ingredients. Add dry ingredients to wet and stir to combine. Fill greased or lined muffin tins 3/4 full with batter and bake 12-15 min for mini muffins, about 25 minutes for regular muffins. We got a dozen regular muffins plus a dozen mini muffins from this recipe.

Friday, September 30, 2011

Canning Diced Tomates

Canned diced tomatoes are a staple of my fall and winter cooking. I use them a lot in chilis, soups and casseroles. I usually buy them from the store. But with 50 lbs of tomatoes sitting on my counter, I decided I had to try at least a few jars myself.


I looked for information online and had a hard time finding good guidelines. There are guidelines for crushed tomatoes, whole tomatoes, halved tomatoes, tomato sauce, tomato juice, but nary a word on diced tomatoes from the "official" websites I visited. I found a few blog posts on diced tomatoes but none of them seemed to follow best practices in regards to acidification.


So, here's what I did, based on my research and reading. Unfortunately, I don't have pictures of the process as I was trying to get it done relatively quickly this morning before Luke had to leave to shoe horses. I will say two things: it is more involved than making sauce but it is not as hard as I thought it would be. I was dreading the blanching and skinning and really, they went super fast and weren't bad at all. Messy, yes but hard or complicated, no. So, here you go.

1) Set a large pot of water to boil over high heat. Prepare another large bowl 2/3 full of ice water (have extra ice on hand to add to this bowl as you go). Make a small X on the bottom of your tomatoes. Once your water is boiling hard, add 3 tomatoes and blanch for about a minute. Move them to the bowl of ice water to cool (large salad tongs work great for this). Peel and discard the skins, which should slide off easily. Continue until all your tomatoes are peeled.

2) Core and dice your tomatoes. You can do a fairly large dice, as they will break down some as they heat up. This is also a good time to get your canner and lids heating and your jars sterilizing.

3) Put roughly 1/6th of your diced tomatoes into a large stock pot and crush them with a potato masher or large spoon to exude juice. Quickly bring to a boil, stirring constantly. Add remaining tomatoes, stirring them in as you go. Bring the whole pot to a boil, stirring frequently. Boil gently for 5 minutes.

4) Acidify your jars. Tomatoes are right on the line for water bath canning so you must add either bottled lemon juice (because it has consistent acidity, unlike fresh lemon juice) or citric acid. Use 1 T lemon juice per pint, 2 T per quart. Ladle hot tomatoes into hot jars. I found it worked well to use a slotted spoon and fill my jars most of the way with the diced tomatoes, then pour in the juice to cover them. Add enough juice to leave 1/2 inch head space.

5) Run a plastic or wooden utensil (I use a chopstick - the end of a wooden spoon works well too) around the sides of your jars to remove air bubbles and then recheck head space; add or remove a little juice as necessary. Wipe rims with a clean, damp cloth and apply heated lids. Screw rings on until they are fingertip tight and return your jars to the canner. Make sure they are covered by a minimum 1 inch of water.

6) Process pints for 35 minutes and quarts for 40 minutes, starting the time when your canner comes up to a full boil. Remove carefully and place on a towel. Allow to rest undisturbed until completely cooled, 12 hours or overnight. Do not re-tighten lids! Once cool, check to make sure that your jars have sealed. When you press down on the lid, it should not pop up again. If any jars did not seal, put them in your refrigerator and use within a week. Label your jars and store in a cool, dark place for up to a year.

Congratulations! You're done! I did 8 wide-mouth pints (one canner load) from start to finish in about 2 hours this morning, so it's not a hugely time consuming project.


*Note: after filling my jars I had quite a bit of extra juice left in my stock pot. This may be strained through a sieve and used in any application you would use regular tomato juice. I added it to my sauce which is cooking down. It would be great for soup. It is also delicious simply to drink!

Thursday, September 29, 2011

Stocking the Shelves

Last year I canned somewhere around 18 quarts of applesauce over the fall and winter and a little apple butter and cranberry sauce for Christmas gifts. This year, I went a little crazy.

I started out with rhubarb marmalade: 6 half pints and 2 4oz jars (not the best picture, sorry!)


Then I moved on to strawberry jam: again, 6 half pints, 2 4 oz jars


Blueberry jam next: (shall we say it in unison?) 6 half pints and 2 4 oz jars


Along with blueberry butter: 4 4 oz jars


and blueberry-rhubarb jam: 4 half pints


Then, there were the savory endeavors.

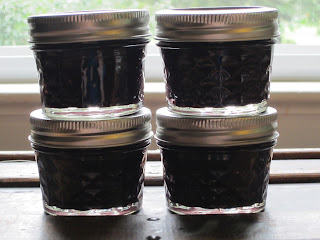
Sweet relish (on the left) and gingered sweet relish (on the right): 4 pints each


Bread & butter pickles: 7 pints


Garlic dill pickles: 8 pints


Aren't they pretty?


Tomatoes! Sweet...
Spicy Tomato Jam: 2 half pints, 11 4 oz jars


Tomato Marmalade: 6 half pints, 4 4oz jars


...and savory.
Tomato Puree and Salsa (pictures to come)


I have over 40 lbs of tomatoes sitting on my counter right now, waiting to be made into more puree and some ketchup. But I've also moved into apples, my first love. Last weekend produced:
Applesauce (12 quarts - actually 14, but two were given to friends without canning them)


It has been so much fun and I am completely addicted to canning! But now I'm saving up for a new stove, since the weight of my full canner has been wreaking havoc on my poor electric burner and even the stove top itself.

Wednesday, September 28, 2011

Roasted Tomato and Kale Tart


Sometimes, I just have a craving for something delicious. Delectable. Something different from the usual fare.

I often have bits and pieces of different things left over in my refrigerator that need to be used up before they go bad.

Occasionally, these two "problems" collide into something special. That was the case tonight.

I had a yummy dinner scheduled for tonight, but it involved lots of chopping of vegetables which, after a long day out and about, I just was not up for. I knew I had a bag of roasted tomatoes that needed using up. What to do with them? Right away I thought of trying a tomato tart, something I've never made before. But I wanted to get some greens into our dinner and I had some kale from the garden and a bit of leftover shredded cheddar cheese to use up as well.

My craving was for something rich, creamy, a little over the top. I didn't have any fancy cheeses to spice things up, but I did have half a block of cream cheese that was starting to get old.


So, this tart was born (okay, so I actually baked it in a pie plate. But "tart" sounds so much better, and next time I will actually bake it as a tart. Because you can be sure there will be a next time.). Let me tell you, it was everything I wanted and more. The humble ingredients combined into something much greater than the sum of its parts. This dish was creamy, crunchy, tangy, sweet, savory - it fit the bill perfectly. Luke thought it would be absolutely irresistible with some spicy italian sausage mixed in, so you may want to try that. But he agreed that it was absolutely delicious as is.

Warning: since I was using things leftover in my kitchen, I have no idea on the amounts. Just use what you have! 


Roasted Tomato and Kale Tart

1 tart shell (I made one with white whole wheat flour, an egg, a little water and coconut oil because I was out of butter. I think the whole wheat adds such a nice depth of flavor, but use whatever you prefer.)
roasted tomatoes
half an onion, chopped
3 cloves garlic
a small bunch kale, chopped small
balsamic vinegar
4 oz cream cheese
grated cheddar cheese
grated parmesan cheese

Bake your tart shell until about half-done. While it's baking, set the cream cheese on the oven to soften. Saute the onions and garlic in a little olive oil until soft and golden. Add kale and saute until bright green; drizzle in a little balsamic vinegar, lower the heat and continue cooking until kale is soft.

Take the tart shell out of the oven and spread the cream cheese over the bottom. Spread the kale-onion mixture on top. Sprinkle with grated cheddar. You don't want tons, or the cheddar will overwhelm the other flavors. Just enough to barely cover the kale. Arrange the roasted tomatoes on top in a circular pattern. Sprinkle with grated parmesan.

Cook in a 350 oven for 20-30 minutes, until crust is lightly browned and cheese is bubbly. Let sit for a few minutes before cutting. Take a bite and swoon at the deliciousness!

Tuesday, September 6, 2011

Tomatoes are a Fruit


Most people know tomatoes are technically a fruit. Despite this fact, it seems they are rarely treated like one. Most home cooks (and home eaters!) are comfortable using them in savory, not sweet applications. So when I mentioned "tomato jam" to my husband, he was quite skeptical. "It's like ketchup on steroids," I said, reassuringly. I'm not sure he was reassured. But after one taste of this amazing concoction, he was a convert. This tomato jam really is incredibly delicious! Mine is a little thinner than a real jammy consistency, but we don't mind since we plan to use it in more sauce-type ways anyway (though it's still plenty thick enough to spread a little on crackers and cheese, mmmm....). Much thanks to Food in Jars and Mrs. Wheelbarrow's Kitchen, whose recipes I combined and tweaked to make my own:


Spicy Tomato Jam
(makes approximately 4 half-pints, depending on how much you cook it down)

7 cups ripe tomatoes, roughly chopped (I used roma)
1/2 cup sugar
1-1/2 c brown sugar
3/4 c freshly squeezed lime juice
1 Tablespoon freshly grated ginger
1 teaspoon ground cinnamon
1/4 teaspoon ground ginger
1/4 teaspoon ground allspice
1/4 teaspoon ground cloves
dash coarsely ground black pepper
2 teaspoons salt
1/2 teaspoon - 1 tablespoon red pepper flakes

As you chop tomatoes, put them in a large, non-reactive saucepan. When about half the tomatoes are chopped, add the sugars, mush a bit with a potato masher (to get the juices flowing) and start cooking over medium heat. Add remaining tomatoes as you chop them.

Add remaining ingredients and bring to a rolling boil, stirring often. Reduce heat and simmer until your jam is thick and silky, about 2 hours depending on how high you keep the heat. As you simmer, taste for spices and adjust as necessary. I started with no ground ginger and only a dash of red pepper flakes and added more of each, along with a little more cloves.

Place in sterilized quarter or half pint jars (I think quarter are best), leaving 1/4 inch head space. Process in a boiling water bath 10 minutes.


Not only do tomatoes make a lovely jam, they make a delicious marmalade as well! Although the taste of the tomato doesn't jump out in this marmalade, you can still tell they are there. This is not a super-sweet marmalade, but it's not incredibly bitter either. It's slightly to the bitter side, more tangy from the grapefruit. Mmmm....


Triple Citrus and Tomato Marmalade
makes about 8 half pints

5 cups chopped tomatoes (I used Golden Girl, which are very mild. I imagine a stronger-flavored tomato would add a more assertive flavor.)
1 grapefruit
1 orange
1 lemon
2-3 additional tablespoons lemon juice
3 1/2 - 4 cups sugar
1/2 - 1 cup honey
dashes of ginger, cloves, allspice and nutmeg, to taste (I didn't use lots of any and none of them are prominent but they're just there enough to lend a deepness to the flavor)

Cut the grapefruit in half, place in a saucepan with enough water so the halves float freely and simmer until very soft, an hour or more. Remove from pan and let cool.

Cut orange and lemon in chunks, remove seeds and pulse (rind, pith and all) in food processor to desired level of chunkiness. Cut grapefruit in chunks and pulse to chop. If desired, pulse tomatoes into small chunks as well. (I made all my pieces pretty small, as I don't care for large chunks.)

Combine all ingredients in a large saucepan and bring to a rolling boil, stirring frequently. Continue to boil, stirring very frequently, until thick - about an hour. Ladle hot marmalade into sterilized jars, leaving 1/4 inch head space. Process in a boiling water bath for 5 minutes.

Friday, June 24, 2011

Cheesecake!

June has been the month of cheesecakes for me. Not that I'm complaining! Cheesecake has always been one of my favorite things, so getting to make (and taste!) lots of them without the guilt of eating the whole thing is great! Earlier this month I made four cheesecakes for our dear friend Lauren's graduation party. There were over 150 people in attendance and the cheesecakes were a big hit! Sadly, in all the craziness of the weekend, I didn't get any pictures. But here are some links to the recipes I used:

Biggest seller: Cappuccino Fudge Cheesecake - this one was the most complicated, with a crust and 3 different layers plus decorating. But it was also incredibly decadent and delicious and everyone fell in love with it!

White Chocolate Cheesecake - I was going to make the caramel sauce for the top, but just ran out of time (remember I said the weekend was crazy?). So I drizzled the top with a little melted white chocolate and it looked lovely and was really delicious. Although there's a lot of white chocolate in there, it wasn't overpowering - just a subtle something extra that was really yummy.

Perfect Plain Cheesecake - This was a really nice plain cheesecake with sour cream topping. We called it "classic" and it really is. Yummy. Personally I prefer a really dense plain cheesecake. This one has a little lighter, creamy texture which is lovely, but not quite "perfect" in my opinion. It was definitely a crowd-pleaser though and was the second cheesecake to disappear.

Kahlua Cheesecake - This is the one I was originally asked to make, a favorite of the graduate and I got the recipe from her mother. The recipe I've linked is almost identical - I think the only difference is the use of graham crackers instead of chocolate wafers for the crust. I drizzled this one with both white and dark chocolate and it was a big hit as well.

Right now I have a fifth cheesecake in my fridge for Lauren's sister Karoline's birthday party tonight. This one is Chocolate Chip Cookie Dough! I originally got the idea from this recipe, but I made lots of changes so it will get its own post, hopefully with pictures.

I have two more cheesecakes I really want to make - anyone have an occasion I can bake for? They are this Brownie Mosaic Cheesecake and an idea I have for a dark chocolate cheesecake with peppermint truffles mixed in. If I get around to making them, I'll let y'all know!

Monday, June 20, 2011

Rhubarb Marmalade

My mother is a marmalade lover. I have a soft spot for it myself. So when I saw this recipe, I knew I would be making it!


Rhubarb Marmalade

6 cups rhubarb
5 cups sugar
2 medium oranges

Chop rhubarb into 1/4" chunks.

Remove any seeds from oranges and then grind in food processor (rinds and all, so wash them well first). I ground them pretty fine.

Combine rhubarb, sugar and oranges in a large pot and bring to a full, rolling boil. (When you first combine them it will not look like a mixture that will ever boil. Resist the urge to add water or other liquid. Have faith and keep stirring a little bit. Before long you'll have a lovely soupy-looking mixture.)

Reduce the heat and simmer until mixture sheets off a spoon. I actually cooked a little longer than this until my mixture was somewhat reduced and thickened. Ladle into hot jars, wipe rims, apply lids and bands and process for 10 minutes in a hot water bath. Remove from canner, place on a towel on the counter and let cool undisturbed overnight. Check seals and store!

I haven't popped open any of the jars yet - I'm waiting until my homemade bread is done later tonight. I did scrape some from the pot, and it was delicious! So simple and unique.

Thursday, June 2, 2011

Southern Summer Sandwich

Pimento Cheese with Hot Pepper Jelly and if you want to go all the way, Bacon.  


Warning: This is southern comfort food, NOT health food.

You can purchase ready-made pimento cheese spread in any grocery store in the south, but if you happen to live elsewhere in the country, you may not be so fortunate.  So you make your own.  I like to make my own anyway.  It's better.

Here's how:
Grate a pound of extra sharp cheddar cheese.  You can use sharp if you want, but I love extra sharp.

Add a jar of pimentos, drained.  In case you don't know, pimentos are those red things that in the middle of olives.  The only way I've ever seen them sold is in a tiny little jar.  Use two if you like pimentos, but be sure you drain them.

Add a dash of hot sauce. Garlic, too, if you like.

Stir it all together with enough mayonnaise to blend.  Not too much.  That's why homemade is better.  You can cut the mayo.

Now for the sandwich.  You will need this ... Hot Pepper Jelly.  In the south, you can find this in the grocery store, too.  I don't know about other places.  But if you can't find it and you really want to make this sandwich, you could, of course, make your own.  I haven't done that yet, but I am planning to copy my friend, Amber, and make JalapeƱo Strawberry Jam.  Anyway, whether you buy it or make, spread some of your hot, sweet, spicy pepper jelly or jam on a piece of good bread.  Sourdough is especially nice.


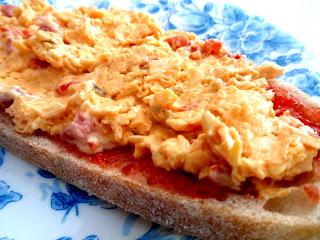
Then spread your pimento cheese.  If you are being decadent, fry up some bacon (you could use turkey bacon if you want to feel slightly more virtuous) and add a couple of slices to your sandwich.  Spread the pepper jelly on the top slice of bread and enjoy the best sandwich you've had in a while.  Sweet tea is optional.


NPR's pimento cheese recipe.  I'll have to try this one for Matthew who loves pickles in all forms.

Monday, April 25, 2011

Peanut Butter Chocolate Chip Cheesecake with Pretzel Crust

Yep, it's a long handle. But this cheesecake deserves it. It was one of my contributions to our Easter dinner with friends and everyone loved it, describing it with words like "decadent" and "sinful." Rich yet not cloying, delightfully peanut-buttery without being overpoweringly so, everyone agreed this was a "do again" and pretty close to a perfect cheesecake. Many thanks and gratitude to the friend who posted the link on an online forum! For anyone else who would like to experience peanut butter cheesecake perfection, here it is: Peanut Butter Cheesecake Recipe.
 

I made two slight changes to the recipe: I only used 4 packages cream cheese (which still makes a very large cheesecake!) and I used 2 full cups of pretzel crumbs instead of 1 1/2. Next time I will make sure my pretzels are very finely ground - I left a few chunks and those seemed a little stale. Other than that, I won't change a thing!

Saturday, April 23, 2011

Brown Butter Yeast Waffles

These were so amazing! I had been wanting to try them for awhile and finally did - so sorry I waited this long! I combined a couple of different recipes into this one and we loved it!

Brown Butter Yeast Waffles

2 cups whole milk
6 tablespoons unsalted butter
3 tablespoons brown sugar
1 teaspoon vanilla
2 eggs, lightly beaten
1/2 teaspoon salt
1 1/2 teaspoons yeast
1 1/2 cups white whole wheat flour
1/2 cup all purpose flour

Melt the butter in a light-colored skillet until lightly browned and nutty. (The butter will start to foam, then the foaming will subside and little brown bits will appear - these are bits of milk fat. Once you see these brown bits, take the butter off the heat so that it does not burn.) Set aside and let cool slightly.

Heat the milk in a separate saucepan until warm, mix in the brown sugar and yeast and set aside for 5-10 minutes, until bubbly.

In a large bowl (you will need room for expansion), mix together the flours and salt. Add the butter, vanilla and eggs to the milk mixture and then mix gently into the flour, stirring just til combined. Batter will be slightly lumpy. Cover and let sit at room temperature overnight.

In the morning, stir the batter and cook in a hot waffle iron until just barely golden brown. These waffles will be crisper and lighter than waffles made with baking powder/soda - if you let them get too much color they will be crunchy. If you take them out when they are just slightly golden, they will be perfect! The aroma while cooking is heavenly.

Serve with butter, maple syrup, and fresh strawberries if you have them. Ohhh, my, delicious!

Thursday, April 14, 2011

Gnocchi!

Awhile back I had quite a bit of ricotta cheese left over from my first attempt at ravioli. I was looking up other uses for it and came across ricotta gnocchi, which sounded enchanting. We made them, and they were pretty good, but ever since I've been curious about the "original" gnocchi made from potatoes. Potatoes have been cheap and plentiful lately, so with lots of leftover mashed potatoes from Saturday's dinner, yesterday seemed like a great time to try them.

The only problem was, I couldn't find a recipe that used leftover mashed potatoes. So, like most things in my kitchen, I winged it. Maybe not a great idea for a food that most recipes describe as "tricky," "delicate," and "takes a few tries to really figure them out," but hey, that's never stopped me before. I mean, come on, how hard can they be with four ingredients: potatoes, egg, flour and a little salt.


I measured 1 1/2 cups mashed potatoes, mixed well with 1 egg and a dash of salt, and then added 1 cup flour, less than I thought I'd need (the dough is supposed to be very soft, almost sticky). I was instantly chagrined to discover that my flour was not mixing in, the dough was definitely not sticky and it appeared the whole thing would be an enormous, rubbery flop. But I gathered up the pieces and very gently kneaded them for a few turns. I actually came out with a lovely soft dough on the other side, not sticky but not stiff either.

Making the actual gnocchi is the fun part. You divide the dough in several sections, roll each into a long snake and then cut them to 1-inch lengths. Then, you roll them across the back of a fork or - what I found worked much better - the end of a whisk, where all the separate pieces come together into the handle. It is best if your thumb and the whisk stay well floured, because this part can get a little sticky. You want one side of the gnocchi to have lines from the whisk, and the other to have a small indentation from your thumb, both of which help your sauce to cling to the gnocchi (I didn't shape my ricotta gnocchi because I was short on time, and it really made the difference! I'll never make them un-shaped again!).


Place the finished gnocchi on a floured surface. Heat a pot of water to boiling and cook the gnocchi in batches, being sure not to crowd the pot. After they float to the top, continue cooking for two minutes or so, then remove to a serving bowl and cook the remaining gnocchi.
 

Serve with whatever sauce you like. I've seen a lot of butter and sage sauces recommended. The sauce we had last night was delicious, though I'm not sure I could duplicate it. I sauteed half an onion and about 5 cloves of garlic in a little olive oil and a smidgen of butter until nice and caramelized. Then, I added about 1/4 cup of leftover collard greens (also from Saturday night) that had been cooked with onion and balsamic vinegar, and maybe 1/3 cup of pasta sauce I had made for pizza last week. These all sat over very low heat while the gnocchi were cooking. When they were done I added about 2/3 cup of the cooking water to the sauce, stirred it well and let it bubble for a minute and then mixed with the gnocchi. It was amazing! I have to see if I can recreate it without all the leftovers at some point.

Here is our finished dish. We really enjoyed it and will be making them again soon!
 

Friday, February 4, 2011

Another kale salad

It's not in the book, but this is a kale salad I must try!

photo from Design*Sponge

Thursday, February 3, 2011

Simple meal plans: Follow the Book #3

Red Taters and Green Grannies
From Simply in Season
(Which is the primary cookbook source for meal plans for a while...)
Here's the low down...

Wash your taters and grannies.
(Granny Smiths, that is)

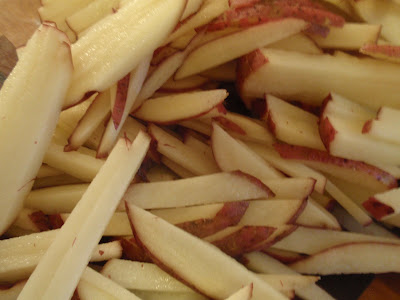
Julienne the taters and thinly slice the grannies.

Chop an onion and saute in a little oil.
I am experimenting with coconut oil. It sure smells nice and it doesn't smoke.


Add the taters and grannies to the pan.  Stir them and saute for a bit.
Salt and pepper to taste.
Add a tiny bit of water to the pan to prevent sticking.
Cover and let cook for about 15 minutes til tender.

Put 1/2 to a cup of sharp cheddar on top.
Place under the broiler til bubbly.

A note about this SIS recipe.  It was good. Comfort food.  We liked the tartness of the apples with the potatoes.  Once again, it needed a tiny bit of oomph.  I think if I'd used extra sharp cheddar that would have done the trick.  I'm really happy with the recipe but will remember to use a sharper, better cheese next time.

We ate this with pan-fried lemon pepper salmon and homemade bread.
Yum.  Yum.  Yum.