Monday, October 22, 2012

Helps

I have several very dear young wife, young mom friends who are thinking hard about the food they eat.  Is it healthy?  Is it within the budget?  How do I do all I have to do and provide healthy, delicious meals for my family?

We've had quite a few conversations about this and I try and remember how I did things when I had a house full of little people.  It's easier now, with just Joel and Coty and me at home, but I remember the days of two grocery carts full.  Once the check-out lady at the Stop 'n Shop told me I needed a cow.  Yeah.  That didn't happen.

Back then, I had my strategies for meal planning and shopping, for keeping a well stocked pantry and making sure I had what I needed when I was ready to cook.  I wrote about some of those things here in the "What We Did" posts.

If you want more guidance, Leila has posted a wonderful set of worksheets to help with figuring out how to plan meals and then execute your plan.  She is so common-sense.  She has a big family, though like me, her children are mostly grown and no longer living at home.  She has done the work of putting her ideas down for you to use.  So, if you're needing some help, go visit Leila.  

Caribbean Collard Greens

Honestly, I'm not quite sure why these should be called Caribbean Collard Greens, but that's what the recipe said on the back of the big bag of chopped collards.  Since I know next to nothing about Caribbean cuisine, I'll just go along with the collard greens people. (I just did a little research.  I think it's the cloves and nutmeg).

Here's what you do ...

Saute an onion, 2-3 sticks of celery, and a couple of cloves of garlic in a little olive oil.

When the onions are soft, add a teaspoon of smoked paprika, a pinch to a quarter teaspoon of cloves and nutmeg, fresh ground sea salt to taste, and if you want a little more jazz, a shake or two of cayenne.  Make sure you use smoked paprika.  It has a very distinctive flavor.

Put in, a handful at a time, your collard greens.  I use a very large cast iron skillet or my trusty cast iron Dutch oven.  It's the perfect cookware for collard greens.  Do you notice I'm not giving you measurements here?  I thought so.  That's because I have no idea how many collard greens you want to eat.  We eat a lot of them.  When we had more people living here, I cooked the whole bag.  Now, I cook at least a half a bag,  keep the leftovers in the fridge and happily eat them several days in a row.  You will want to adjust your spices to the amount of greens you cook.  The amounts mentioned above are for half a bag.  Anyway ...

... as you put the collards in your pot, stir them around so the onion, celery, garlic, olive oil, spice mix coats them and mixes all through.  The collards will begin to wilt and cook down and you'll be able to add more to you pot.  Once you have them all in and stirred and coated, add some chicken stock.

Whenever I cook a chicken (or cheat and buy a rotisserie chicken at the store) and have the carcass left over, I make broth.  It's easy.  My friend, tonia, will tell you how.  She'll also tell you how to brine and roast a chicken.  Scroll down to the bottom of the page to get to the broth directions.  It is also not that hard to do.  (I'm going to keep telling you this).

Back to the collards.  You can put in a lot or a little chicken stock.  If you put in a lot, you will have this delicious pot likker bubbling in your pot, into which you can later dip your cornbread.  If you put in a little, your greens may not cook down quite as soft, but that's ok, too.  I like them both ways.

Cover them, turn the heat to low, and let them cook for 10-15 minutes ... or longer, if you want them softer.  The only way you can mess them up is if you didn't put in much liquid and you leave the heat on high and go off to do something very important in another room and forget about your collard greens.  Burned collard greens are not delicious.  How do I know this?  Don't ask.

Since I like to make my plate colorful, we ate these collards with a side of fire- roasted corn (frozen, in a bag, from the grocery store) sauteed with red onion and red and yellow sweet pepper.  A little fresh ground salt and pepper and a little sharp cheddar melted on top - perfect.

Also on the plate - a big chunk of molasses spoon bread.  I made it in the large cast iron skillet so it took longer to cook (as the recipe indicates) -  about 25 minutes.  Just keep checking it til it doesn't jiggle in the center any longer.  We didn't put the honey butter on top.  It didn't need that extra sweet.  (I did reheat a piece the next morning for breakfast and top half of it with fig butter and the other half with a really good marmalade.  Breakfast treat!).


Clearly, I am not a food photographer, but there it is ...

Caribbean collards
Roasted corn and sweet pepper saute and
Molasses spoon bread

Enjoy!

Sunday, October 21, 2012

Extra Spicy Gingersnaps with Chai Frosting

I have, in the past, been called a creative cook, but you wouldn't know it from the dearth of blog posts here in the last few months.  I mostly think I am a good copy-cat with a can-do attitude and some years of experience reading recipes and cooking for a big family.  I have learned how to tweak and adapt to suit my tastes.  I am not afraid to improvise.  I have been known to say, when describing a successfully adapted recipe or cooking idea, that "I just ... did this or that."  That's what happened when I made gingersnaps recently. "I just" added more spices, made a frosting, and came up with a way to serve it as a dessert treat.

I'm going to keep try and keep track of some of those "I just" recipes here.  Coming back to this space and trying to gussy up the old header, however, I discovered my lack of decent, recent food pictures.  So, until I take some, the header will look rather dull.  That's how it is when you are reworking something, right?  You have to go through things being moved around and out of place and not really what you want while you work to get it just right.  So, bear with me.

In the meantime, I offer you my new favorite cookie recipe, with my very great thanks to Irma, whose original recipe I have tweaked, and to Coty, who gave me my copy of Joy the very first Christmas I knew him.

Extra Spicy Gingersnaps with Chai Frosting 

1 1/2 cups softened butter (3 sticks)
3 cups sugar
1 cup molasses
4 eggs
3 tsp. balsamic vinegar
7 1/2 cups flour
3 tsp. baking soda
2-3 Tablespoons ground ginger (yes, I know that's a lot, like the title says, extra spicy)
1 teaspoon cinnamon
1/2 teaspoon cloves
1/4 teaspoon cayenne pepper

Preheat over to 325.  Cream the butter.  If you forget to leave it out to soften, you can do it in the microwave for a few seconds.   Don't melt it, just get it soft.

Add sugar to the butter with electric mixer.  I use my Magic Mill - best mixer ever, still going strong after 20 years!  Mix in molasses and vinegar.

In a separate bowl, sift together the dry ingredients.

Add to wet ingredients and mix til blended.

Roll into 3/4 inch balls and place on greased cookie sheet.  Bake 9-11 minutes.  The cookies get that gingersnap crinkle look as they bake.

Remove from oven.  Place cookies on cooling rack.  They will be soft-ish.  That's OK.  You want them soft and chewy.  At least, I do.

Chai frosting

I buy chai spices, also called Tea Masala, already ground and mixed together at the Indian grocery.  There are recipes online, like this one, if you want to make your own.

This is one of those "I just" recipes.  No measurements.  I just add some chai spice powder (about a teaspoon, maybe more, depending on your taste) to some powdered sugar, let's say a quarter of a cup, maybe more. I know I should have measured.  Sorry.  Add enough half and half to make a smoothly flowing icing, not too think, not too runny.  Put it in a small plastic bag, snip off one corner to make a small hole, and squeeze the icing artistically over your cookies.  Be sure the cookies are completely cool before you do this.


If you want to take these cookies a step further, into the decadent dessert department, try this...

Make some homemade caramel sauce.  Really easy.  I promise.  Just follow the directions.

After your sauce is made, break a couple of cookies into chunks in a bowl.  Soften them by warming them in the microwave for 10 seconds.

Take them out and put a scoop or two of your favorite vanilla ice cream on top of the warm cookies.

Spoon caramel sauce over the cookies and ice cream.  Yes, it is very good.  Joel and Albert agree and Albert even brought a half gallon of vanilla ice cream to my house this afternoon in the hopes that there were still cookies and caramel sauce left.

Another sticky, messy version of this dessert if you're out of ice cream and just happen to have marshmallows in your pantry is to place a marshmallow on top of the cookies, soften in the microwave at the same time, and spoon caramel sauce on top of that.  Ooey gooey once in a blue moon treat.

It's a little strange for me to start writing about food again with a cookie/dessert recipe since we don't eat a lot of sweets around here.  When I make something sweet, though, I want it to be worth the calories.  No kind-of-good cookies around here.  If I'm going to eat them, they have to be special.  These are!

Wednesday, February 8, 2012

Lemony spinach soup

1 large onion
chicken or veggie stock (I used a couple of quarts)
cooked brown rice (I used about two cups)
fresh spinach (I used a whole bag of fresh)
2 cans garbanzo beans
2 eggs
juice from 2 large lemons

Saute the onion in a little olive oil.  Add the chicken or veggie stock, brown rice, garbanzos, and spinach.  Let simmer til the spinach cooks down (I used fresh.  Frozen would work well, too).

While that simmers, whisk the eggs into the lemon juice.  Beat til frothy.  Slowly pour into the soup, stirring constantly.

Add freshly ground salt and pepper, or lemon pepper if you like, to taste.

I gave you the amounts I used, but you could adjust this depending on whether you wanted it lighter with more broth and heartier, with more rice.

Enjoy!

We ate this with baked sweet potatoes and bread.  Tonight we had it again with roasted beets and a big salad with beet stems chopped very small, grapefruit, and artisan lettuce salad.  Great meal.

Thanks to Rachel, who told me while we walked on Tuesday, about the lemony chicken soup she makes.  This is my approximation without the chicken.

Sorry.  No pretty picture.


Thursday, November 3, 2011

Scarlet Gingerbread Muffins


There's something about fall that just cries out for muffins. And spices. And something a little sweet and special.

But (ask anyone) I am a food nazi. I admit I am obsessive about what my daughter eats. I am also obsessive about not wasting anything. Sometimes these tendencies are frustrating. Other times, like today, they result in a fortuitous discovery of a new favorite food.


We had some boiled beets sitting in the fridge that needed to be used.


I wanted something other than your typical beet-chocolate combo.


But the only other recipes I found sounded boring, with nothing special in them but beets!


Oh, and sugar. Let's not forget the sugar. Every recipe had plenty of sugar. That's a no-no in this house. As is regular, all-purpose flour, unless you're a cake or a cookie.


So, we just had to come up with our own recipe.


If you try these, beets might just become your new favorite food. I guarantee, you can't eat just one! These are even sweet enough to call a cupcake, if you so desire. They would be lovely as a first birthday cake, spread with a little honey-cream cheese frosting.


If you are cooking with a little one, remember, beets stain! Vinegar, lemon juice and cold water are your friends. A little pre-wash spray doesn't hurt either.

I'm sorry I don't have exact spice measurements. That's what happens when a two year old shakes in the spices for you.

Enjoy!


Scarlet Gingerbread Muffins

2 cups white whole wheat flour
2 t baking powder
1 t baking soda
1/2 t salt
Approximately:
1 1/2 t ginger
1-2 t cinnamon
1/4 t cloves
1/4 + t nutmeg
1 cup milk
1/3 cup oil (we used a mixture of coconut and olive since I didn't have veggie on hand)
2 large eggs, beaten
1/4 cup honey
1/4 cup molasses
1 t vanilla extract
1 cup pureed beets

Preheat oven to 350. Whisk together dry ingredients. In a separate bowl, whisk together wet ingredients. Add dry ingredients to wet and stir to combine. Fill greased or lined muffin tins 3/4 full with batter and bake 12-15 min for mini muffins, about 25 minutes for regular muffins. We got a dozen regular muffins plus a dozen mini muffins from this recipe.

Friday, September 30, 2011

Canning Diced Tomates

Canned diced tomatoes are a staple of my fall and winter cooking. I use them a lot in chilis, soups and casseroles. I usually buy them from the store. But with 50 lbs of tomatoes sitting on my counter, I decided I had to try at least a few jars myself.


I looked for information online and had a hard time finding good guidelines. There are guidelines for crushed tomatoes, whole tomatoes, halved tomatoes, tomato sauce, tomato juice, but nary a word on diced tomatoes from the "official" websites I visited. I found a few blog posts on diced tomatoes but none of them seemed to follow best practices in regards to acidification.


So, here's what I did, based on my research and reading. Unfortunately, I don't have pictures of the process as I was trying to get it done relatively quickly this morning before Luke had to leave to shoe horses. I will say two things: it is more involved than making sauce but it is not as hard as I thought it would be. I was dreading the blanching and skinning and really, they went super fast and weren't bad at all. Messy, yes but hard or complicated, no. So, here you go.

1) Set a large pot of water to boil over high heat. Prepare another large bowl 2/3 full of ice water (have extra ice on hand to add to this bowl as you go). Make a small X on the bottom of your tomatoes. Once your water is boiling hard, add 3 tomatoes and blanch for about a minute. Move them to the bowl of ice water to cool (large salad tongs work great for this). Peel and discard the skins, which should slide off easily. Continue until all your tomatoes are peeled.

2) Core and dice your tomatoes. You can do a fairly large dice, as they will break down some as they heat up. This is also a good time to get your canner and lids heating and your jars sterilizing.

3) Put roughly 1/6th of your diced tomatoes into a large stock pot and crush them with a potato masher or large spoon to exude juice. Quickly bring to a boil, stirring constantly. Add remaining tomatoes, stirring them in as you go. Bring the whole pot to a boil, stirring frequently. Boil gently for 5 minutes.

4) Acidify your jars. Tomatoes are right on the line for water bath canning so you must add either bottled lemon juice (because it has consistent acidity, unlike fresh lemon juice) or citric acid. Use 1 T lemon juice per pint, 2 T per quart. Ladle hot tomatoes into hot jars. I found it worked well to use a slotted spoon and fill my jars most of the way with the diced tomatoes, then pour in the juice to cover them. Add enough juice to leave 1/2 inch head space.

5) Run a plastic or wooden utensil (I use a chopstick - the end of a wooden spoon works well too) around the sides of your jars to remove air bubbles and then recheck head space; add or remove a little juice as necessary. Wipe rims with a clean, damp cloth and apply heated lids. Screw rings on until they are fingertip tight and return your jars to the canner. Make sure they are covered by a minimum 1 inch of water.

6) Process pints for 35 minutes and quarts for 40 minutes, starting the time when your canner comes up to a full boil. Remove carefully and place on a towel. Allow to rest undisturbed until completely cooled, 12 hours or overnight. Do not re-tighten lids! Once cool, check to make sure that your jars have sealed. When you press down on the lid, it should not pop up again. If any jars did not seal, put them in your refrigerator and use within a week. Label your jars and store in a cool, dark place for up to a year.

Congratulations! You're done! I did 8 wide-mouth pints (one canner load) from start to finish in about 2 hours this morning, so it's not a hugely time consuming project.


*Note: after filling my jars I had quite a bit of extra juice left in my stock pot. This may be strained through a sieve and used in any application you would use regular tomato juice. I added it to my sauce which is cooking down. It would be great for soup. It is also delicious simply to drink!

Thursday, September 29, 2011

Stocking the Shelves

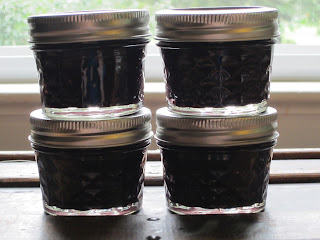
Last year I canned somewhere around 18 quarts of applesauce over the fall and winter and a little apple butter and cranberry sauce for Christmas gifts. This year, I went a little crazy.

I started out with rhubarb marmalade: 6 half pints and 2 4oz jars (not the best picture, sorry!)


Then I moved on to strawberry jam: again, 6 half pints, 2 4 oz jars


Blueberry jam next: (shall we say it in unison?) 6 half pints and 2 4 oz jars


Along with blueberry butter: 4 4 oz jars


and blueberry-rhubarb jam: 4 half pints


Then, there were the savory endeavors.

Sweet relish (on the left) and gingered sweet relish (on the right): 4 pints each


Bread & butter pickles: 7 pints


Garlic dill pickles: 8 pints


Aren't they pretty?


Tomatoes! Sweet...
Spicy Tomato Jam: 2 half pints, 11 4 oz jars


Tomato Marmalade: 6 half pints, 4 4oz jars


...and savory.
Tomato Puree and Salsa (pictures to come)


I have over 40 lbs of tomatoes sitting on my counter right now, waiting to be made into more puree and some ketchup. But I've also moved into apples, my first love. Last weekend produced:
Applesauce (12 quarts - actually 14, but two were given to friends without canning them)


It has been so much fun and I am completely addicted to canning! But now I'm saving up for a new stove, since the weight of my full canner has been wreaking havoc on my poor electric burner and even the stove top itself.